Plan for Gladiolus
by Barb Henny
Gladiolus were not on my mind on a cold, gray February afternoon when I dashed into my favorite box store to pick up some hardware items. I headed for the cashier in the garden center, where I ran smack dab into a freshly-stocked display of spring bulbs. The photographs were irresistible. On impulse, I bought a package of each color on the rack.
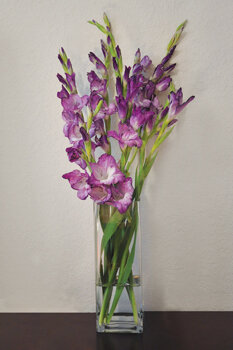
“Glads” make beautiful cut flower arrangements — even in just one color. Photo by Barb Henny
Gladiolus are marketed with the spring bulbs, but they are actually corms. Corms, tubers, rhizomes, true bulbs and tuberous roots are all casually called “bulbs” and are all positioned together for sales purposes. The common theme on the sales rack is a botanical adaptation for plant survival between growing seasons. Whether the climate switches from hot to cold (as in north Florida), or from wet to dry (as in central and south Florida), sustaining life until the next favorable growth cycle is the strategy.
Corms are compressed stems and look flattened compared to true bulbs like Amaryllis or onions. I carefully examined the gladiolus corms on the rack; they were plump and firm. Avoid squishy, moldy, broken or dehydrated ones and check the count, since some bags get torn.

Flower stalks curve easily if not tied. Photo by Barb Henny
An onion bulb has a covering called “skin” or “paper.” A gladiolus corm should have a netted covering called a “tunic” or “sheath.” The shipping and handling process of mass merchandising is hard on the tunics, but gladiolus corms should not be bare. A bare tunic is an invitation to Fusarium fungal rot.

Plant gladiolus corms to the proper depth. Photo by Barb Henny
Since gladiolus were an impulse buy, I had not considered where I’d put them in my landscape. Instructions on the package indicated full sun. I decided the south side of my vegetable garden would receive light all day. Having the gladiolus and veggies share space seemed like a good idea at the time.
The vegetable garden had been rototilled and was easy to dig. I created a bed 5 feet long by 3 feet wide by 7 inches deep. I used a scrap of board and a PVC pipe to keep an even depth as I added a 1-inch layer of good compost to set the corms on. Corms have a basal plate from which the roots develop and one or more growing points at the tip. I spaced them 4 inches apart, covered them and watered them in.
In the 1950s, Florida boasted over 8,000 acres of gladiolus production and was one of the leading producers in the U.S. California, Michigan and New York are the commercial sources now, and no major growers are left in Florida. Labor costs, chemical expense and a recommended five-year crop rotation plan have all discouraged production.
I planted my gladiolus on the Ides of March (March 15th). By May 15th, I still had no gladiolus flowers. But I was learning a lot about “right plant, right place.” My vegetable garden soil is pH neutral at 7.0 to 7.2. The gladiolus would have preferred a more acid location at 5.8 to 6.5. My vegetable garden was fertilized with granular 8-4-8. Gladiolus would have preferred a bloom-enhancing 12-55-6 or 15-30-15 formula. Temperatures in my vegetable garden in full sun by mid-May were well over 90°F. Gladiolus are in the Iris family and would have grown better between 50° and 70°F. Armyworms, wireworms, cutworms, hornworms, aphids and thrips marched back and forth between vegetables and gladiolus, well fed.
What really hurt my gladiolus was the wind. The location was not sheltered. The stems blew over every day. Gladiolus are extremely sensitive to geotropism. Stalks bend very quickly against the tug of gravity due to auxin hormone response. Commercial growers ship gladiolus cut flowers in upright boxes with directional arrows and clearly labeled, “This End Up,” to prevent stem curves. Field growers bank and mound rows for the same reason. No amount of diligence kept the flower stalks straight in my vegetable garden. My flower stems curved like crazy.
I had dreamed on that dreary February day that all 6 varieties would bloom simultaneously and yield a gorgeous mixed border. They bloomed sequentially. First all the blue ones bloomed. Then all the orange ones bloomed, then red, then pink, then yellow and finally white. I never got a full vase of mixed colors.
Gladiolus taught me a valuable lesson. Research is needed before trying a new crop. I wish I had read books and articles before I made an impulse buy. Short cuts proved short sighted. I was frustrated trying to catch up on crop requirements all season. Mostly, I regret not having made a plan to optimize this classic garden flower.
Barb Henny often writes about Florida vegetable gardening. This was her first, but not last, try at growing gladiolus.
© 2014 Barb Henny. Originally published in Florida Gardening, Aug / Sep 2014. Reprinted by permission. All rights reserved.
More information:
Garden Bulbs for the South by Scott Ogden
Historic document on growing gladiolus in Florida: https://ufdc.ufl.edu/UF00028042/00001